
Building a Safe and Realistic Hacking Lab
2025-04-23
Setting up a secure and isolated environment is crucial when learning penetration testing or practicing on vulnerable machines. In this blog post, I’ll walk you through how I built a VirtualBox-based lab using Kali Linux, a pwnable VM, and a pfSense virtual router. The goal? Complete network isolation for offensive testing, while still allowing Kali to access the internet — without exposing the vulnerable VM or the host network.
🧠 Why This Setup?
VirtualBox's internal network mode provides perfect isolation but lacks internet access. To overcome this while maintaining strict control over traffic, I introduced pfSense as a virtual router:
- Kali Linux: Needs internet access for tools, updates, research, browsing, and should be able to attack the pwn box.
- Pwn box VM: Must be fully isolated from the internet and only reachable by Kali.
- pfSense: Acts as a router, DHCP server, and firewall — the heart of the lab.
🔌 Network Topology
[Internet] <---> [Bridged Adapter] (WAN) - pfSense - (LAN) [Internal Network]
                                                        |-> Kali Linux (192.168.1.50)
                                                        |-> Pwn box (via DHCP)
🚀 Step-by-Step Guide
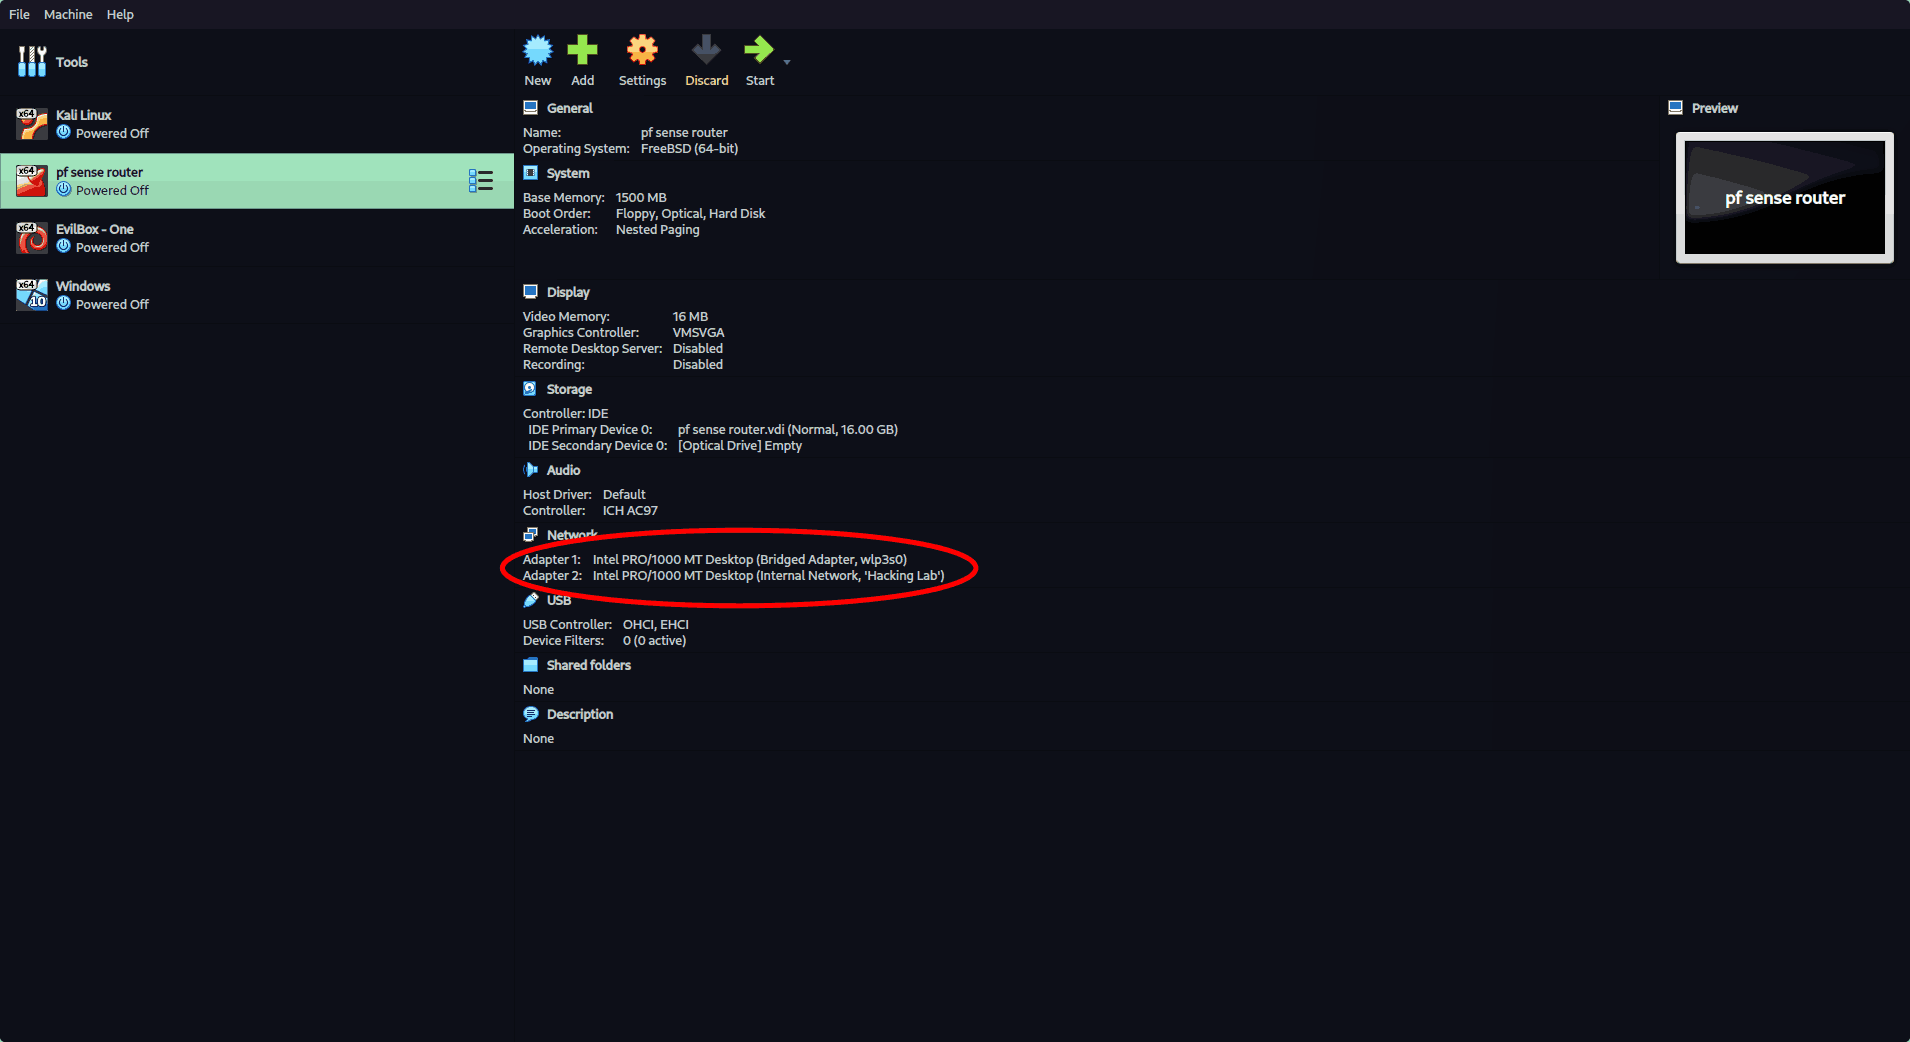
1. Set Up pfSense VM
- Create a new VM and install pfSense CE.
- Add two adapters:
- Adapter 1 (WAN): Bridged Adapter (connects to your physical network for internet access).
- Adapter 2 (LAN): Internal Network (e.g.,
intnet).
- Boot into pfSense, configure interfaces:
- WAN → Bridged
- LAN → Internal Network
- Assign LAN IP (e.g.,
192.168.1.1).

2. Set Up Kali Linux VM
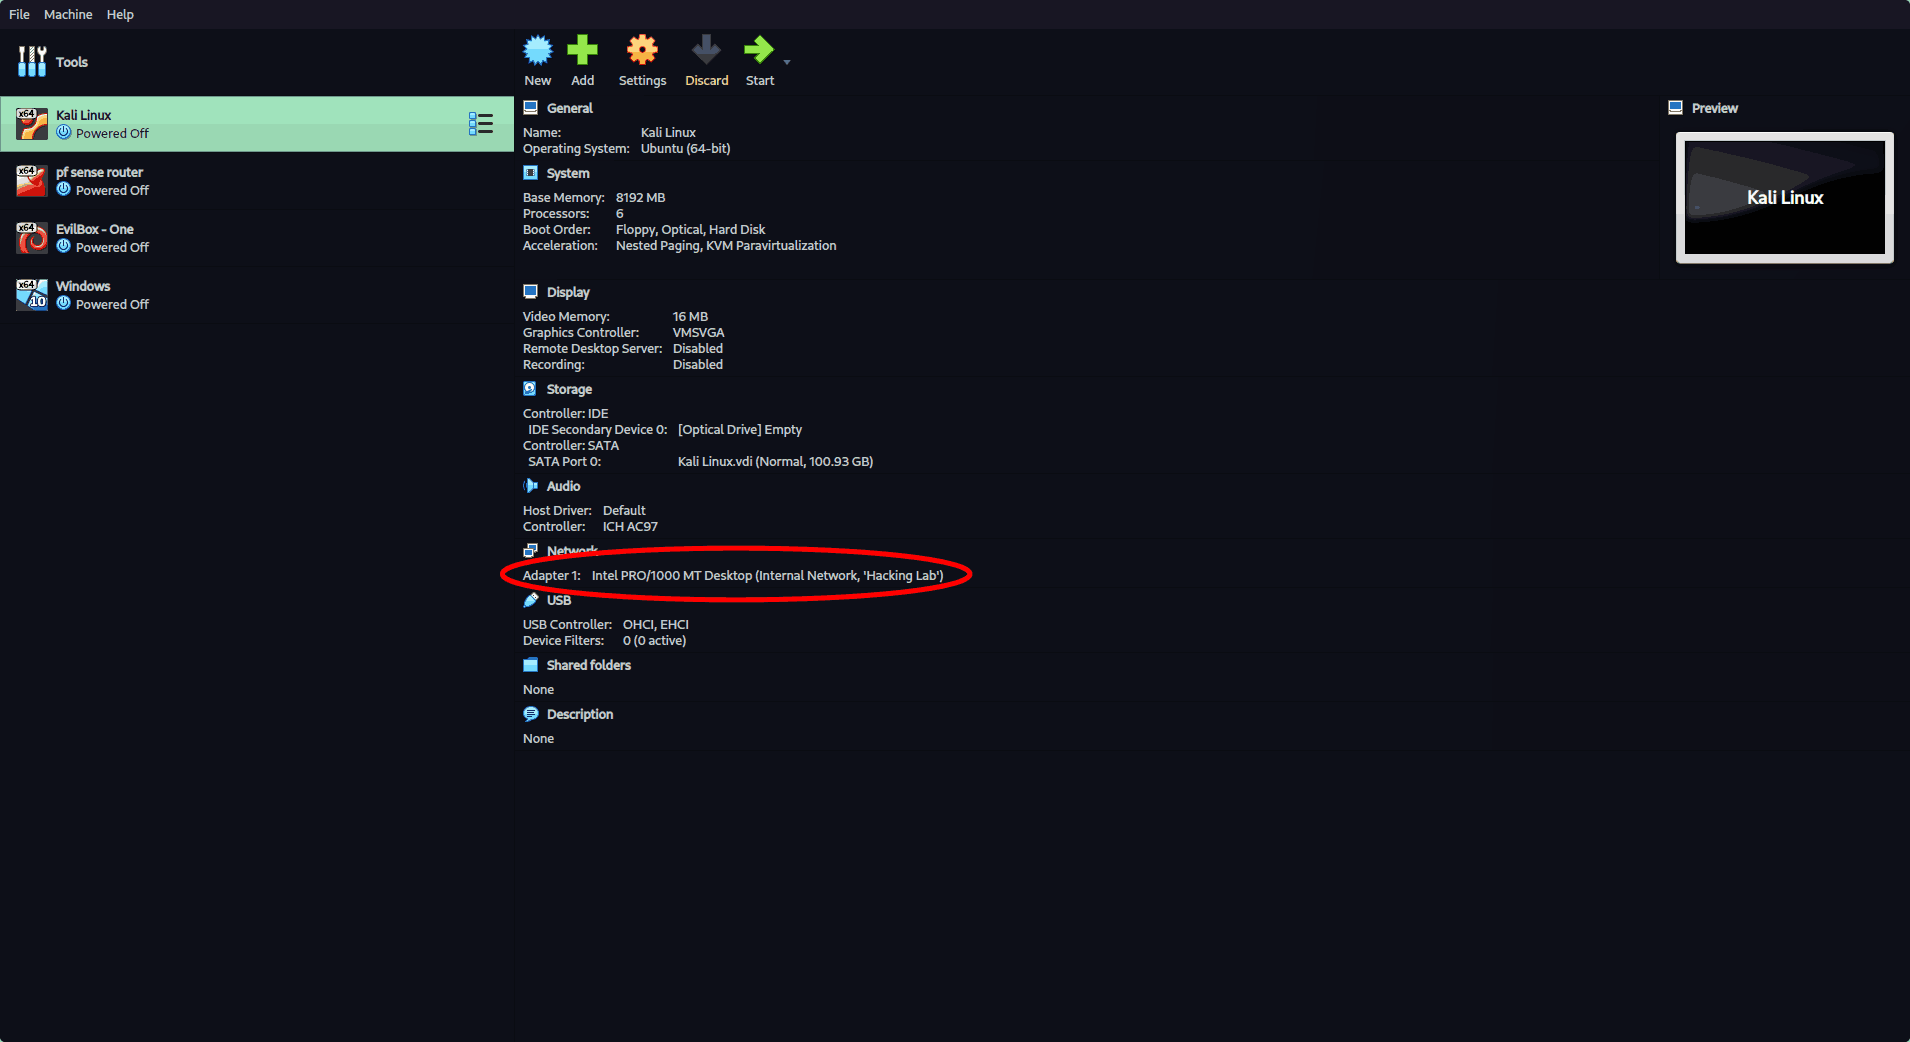
- Attach the network adapter to the same Internal Network as pfSense.
- Manually assign a static IP (e.g.,
192.168.1.50).
3. Set Up the Pwn Box VM
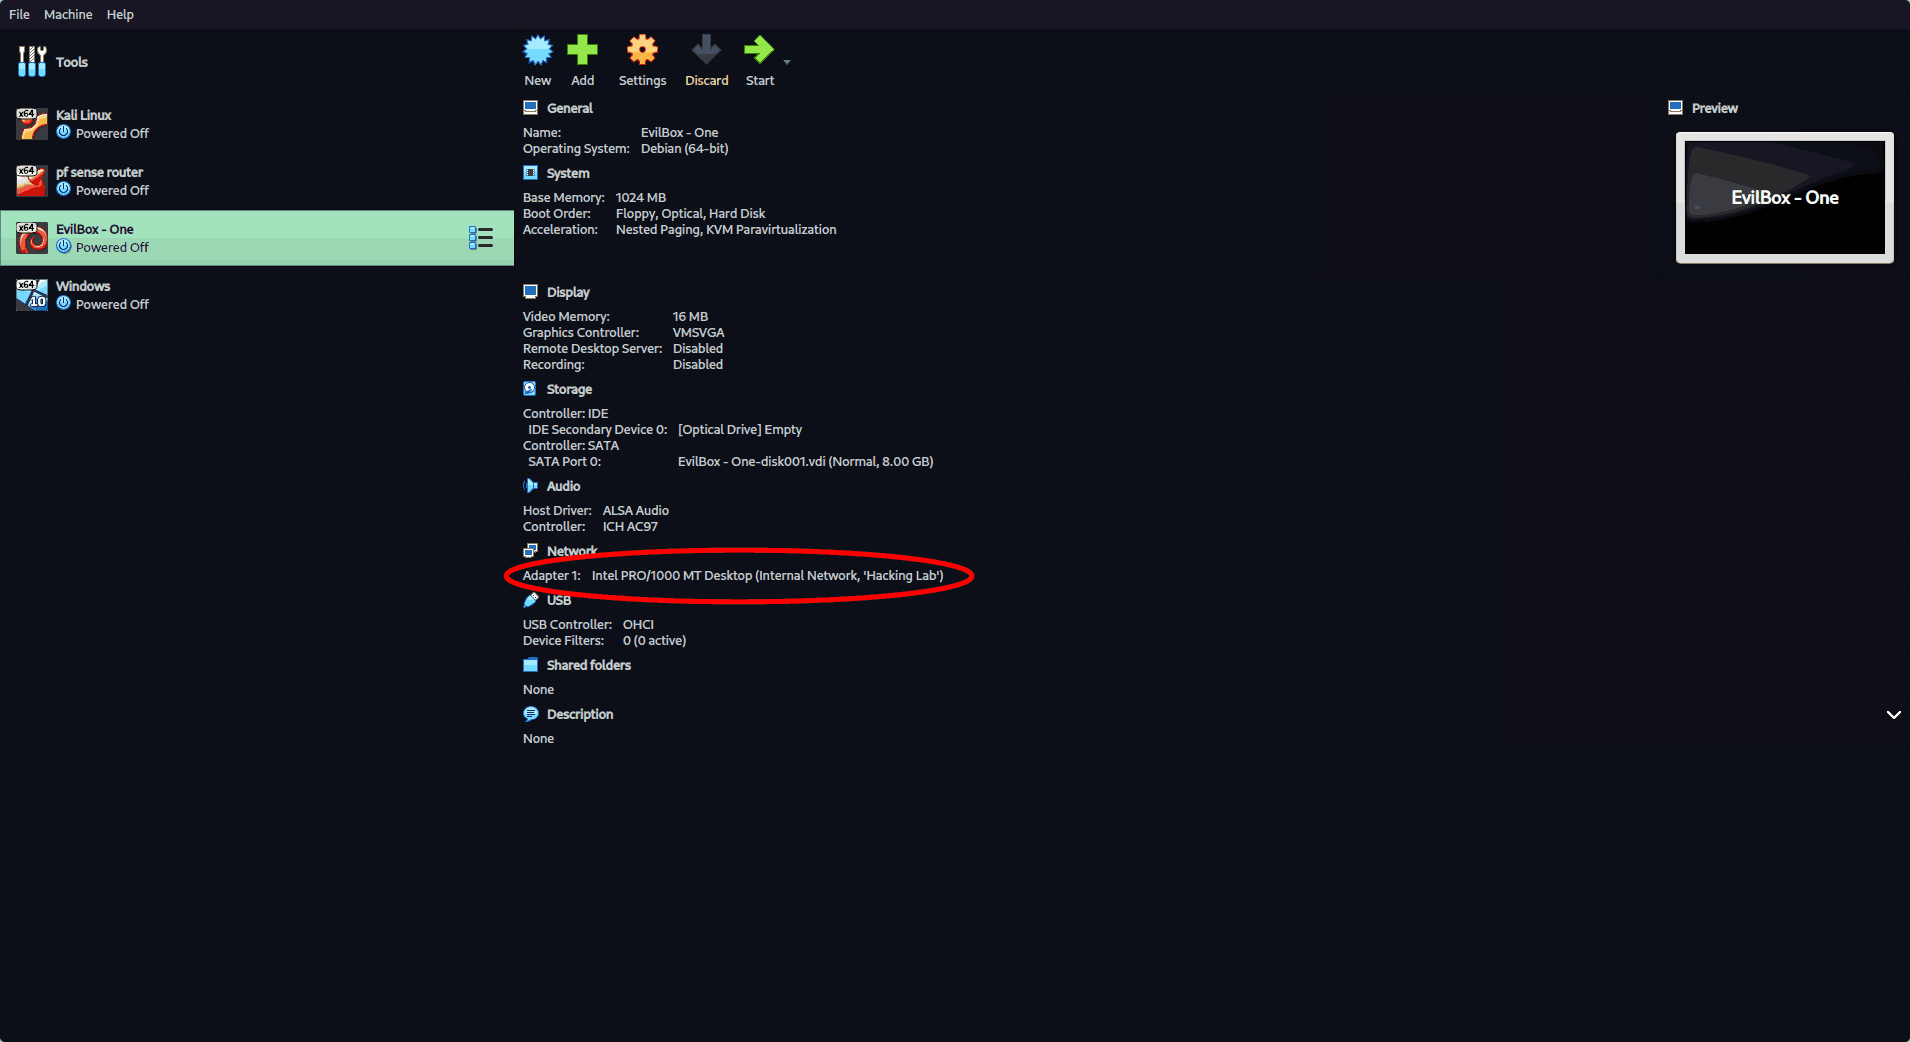
- Attach to the same Internal Network.
- Leave network config to automatic (DHCP) — pfSense will assign an IP.
4. Configure pfSense Firewall Rules
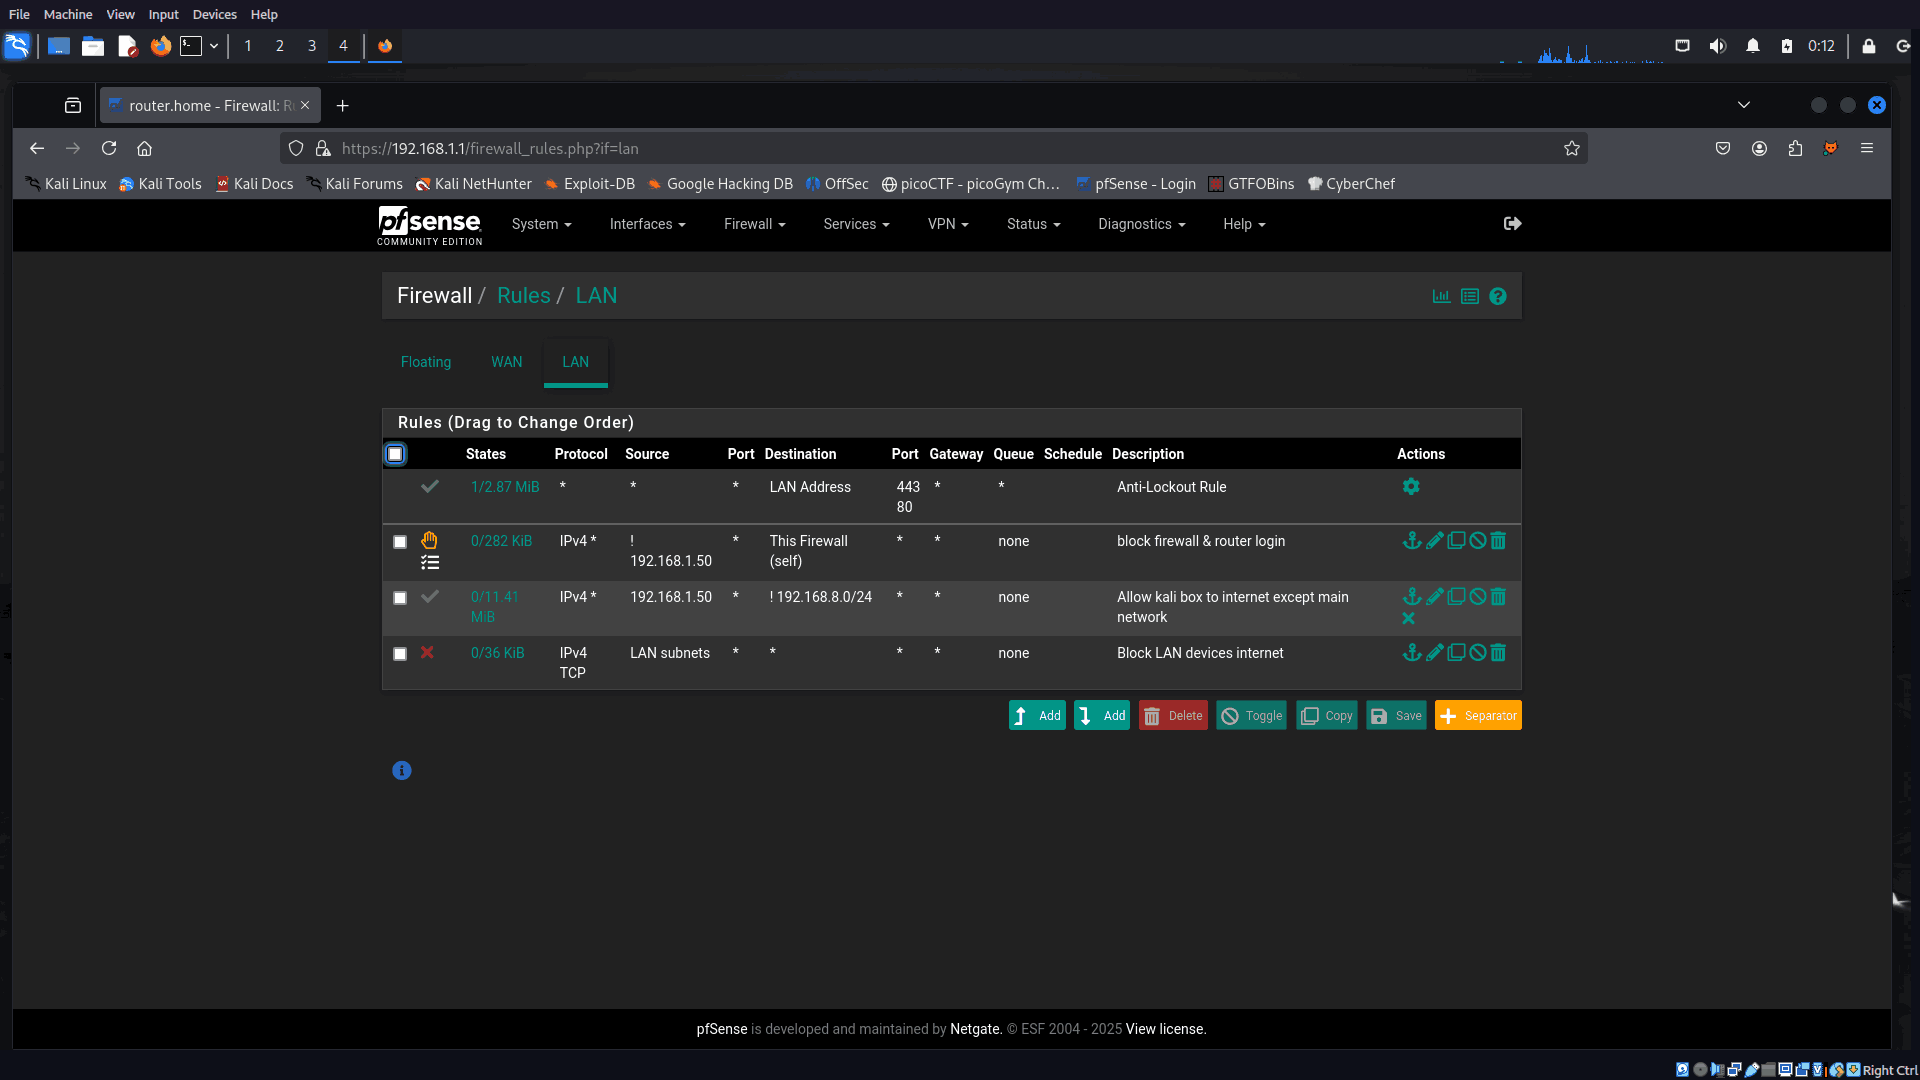
🔒 LAN Rules
Here’s the breakdown of LAN-side rules:
- Allow only Kali (192.168.1.50) internet access.
- Block all other LAN devices (like the pwn box) from reaching internet.
- Block all devices (except Kali) from accessing pfSense.
- Block LAN to LAN traffic, except for Kali to pwn box (this allows pentesting).
- Kali or pwn box can’t reach your main network
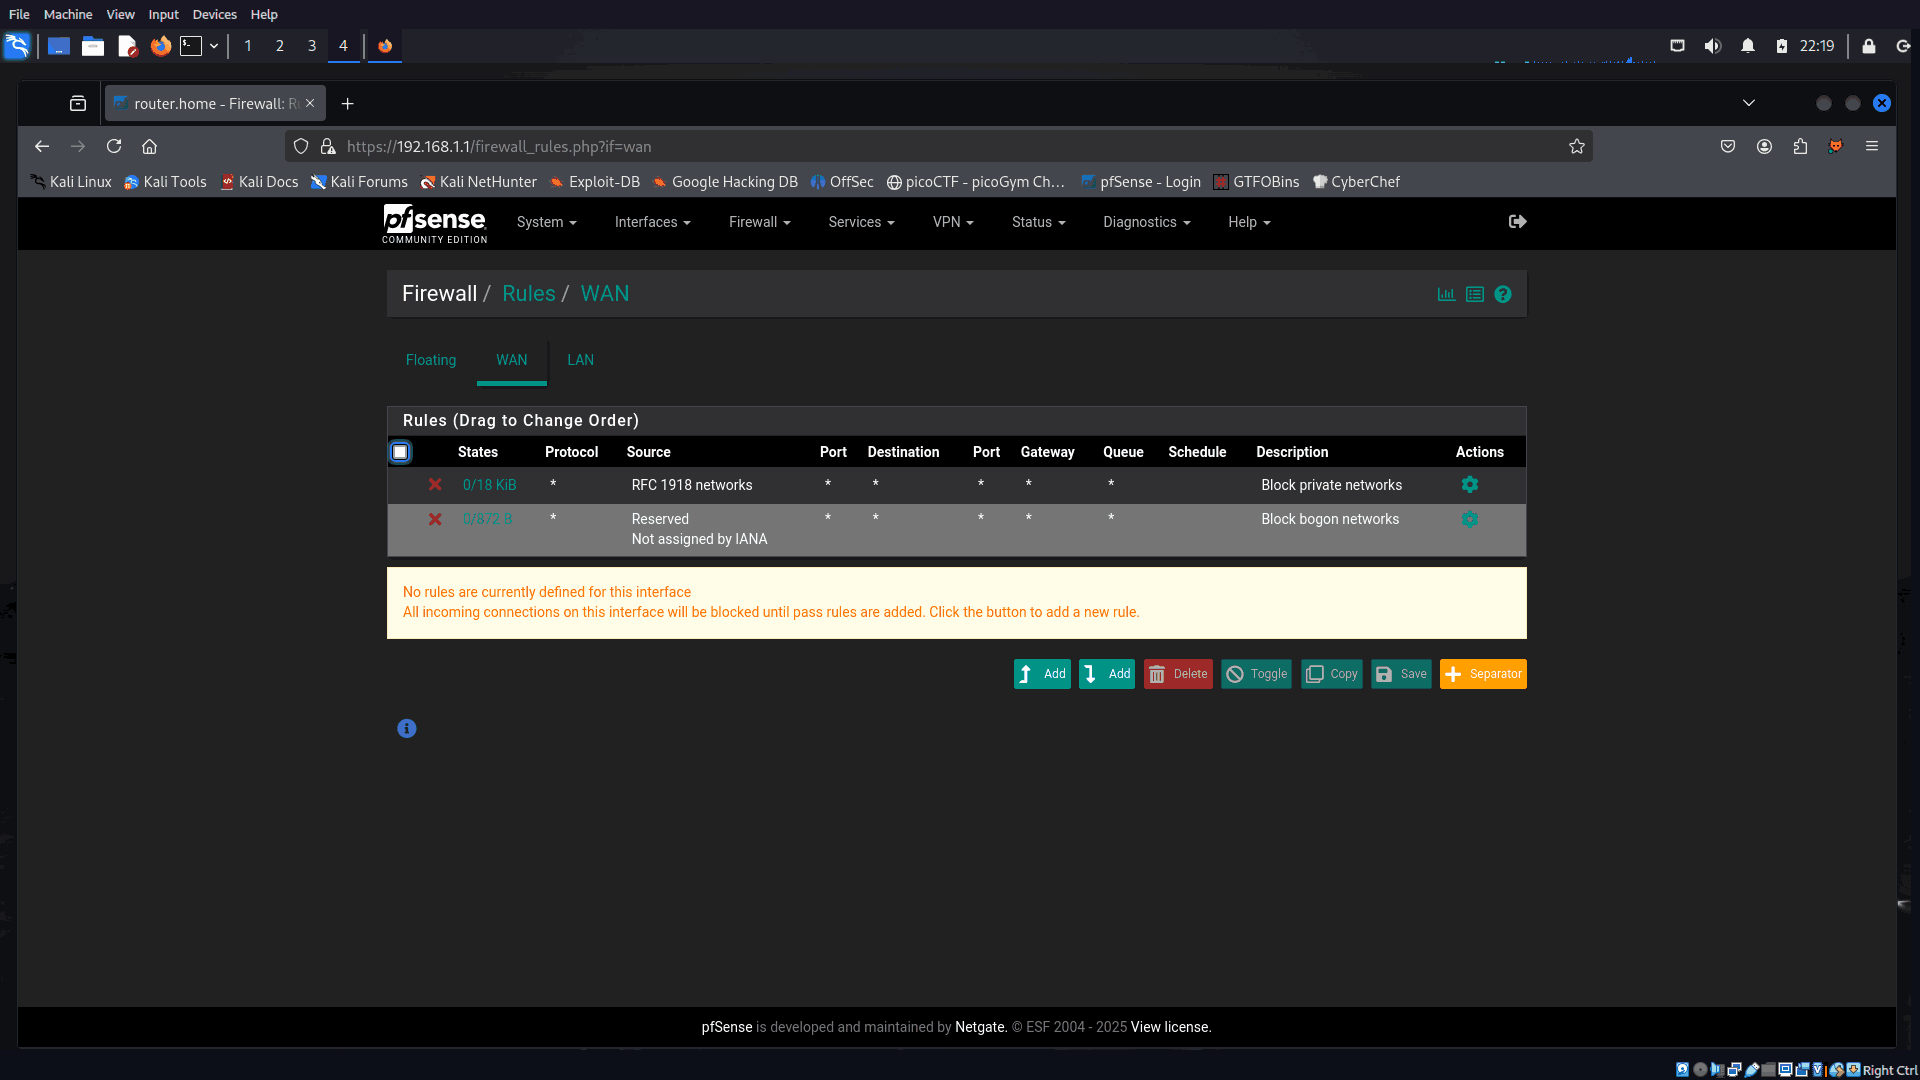
🔥 WAN Rules
- Block all incoming connections on the WAN interface.
- Ensures the virtual lab is not reachable from the outside world.
✅ Test Your Lab
- Kali should have internet access and full visibility of the pwn box but can't reach your main network.
- Pwn box should not have internet or router UI access.
- External threats can't reach your VMs.
⚡ Why This Lab Setup Rocks
- 🔐 Security: Real-world segmentation with tight firewall rules.
- 🎯 Focus: Only Kali gets internet, nothing else leaks out.
- 🧪 Practicality: Perfect for exploit dev, CTFs, and vulnerability research.
- 🔄 Reusable: Reset and restart as many times as needed — all inside VirtualBox.
Ready to take your infosec skills to the next level? 🔧 Set up this lab and start hacking in a controlled, isolated, and safe environment. Feel free to reach out if you want any help.
📚 CTF Writeups
A growing collection of CTF challenges I’ve solved — with detailed writeups, screenshots, and techniques.
🔗 Related Posts
- My Privacy First Workflow — Keeping my digital security stack secure without relying on cloud-based services.
- My Self-Hosting Journey — After switching to Linux, I went fully self-hosted — here's how I built my personal server setup.